Leather is a major trend this season and continues on into the spring, yes leather for spring and summer! Here are a few tips to get you started:
TIP 1. FABRIC
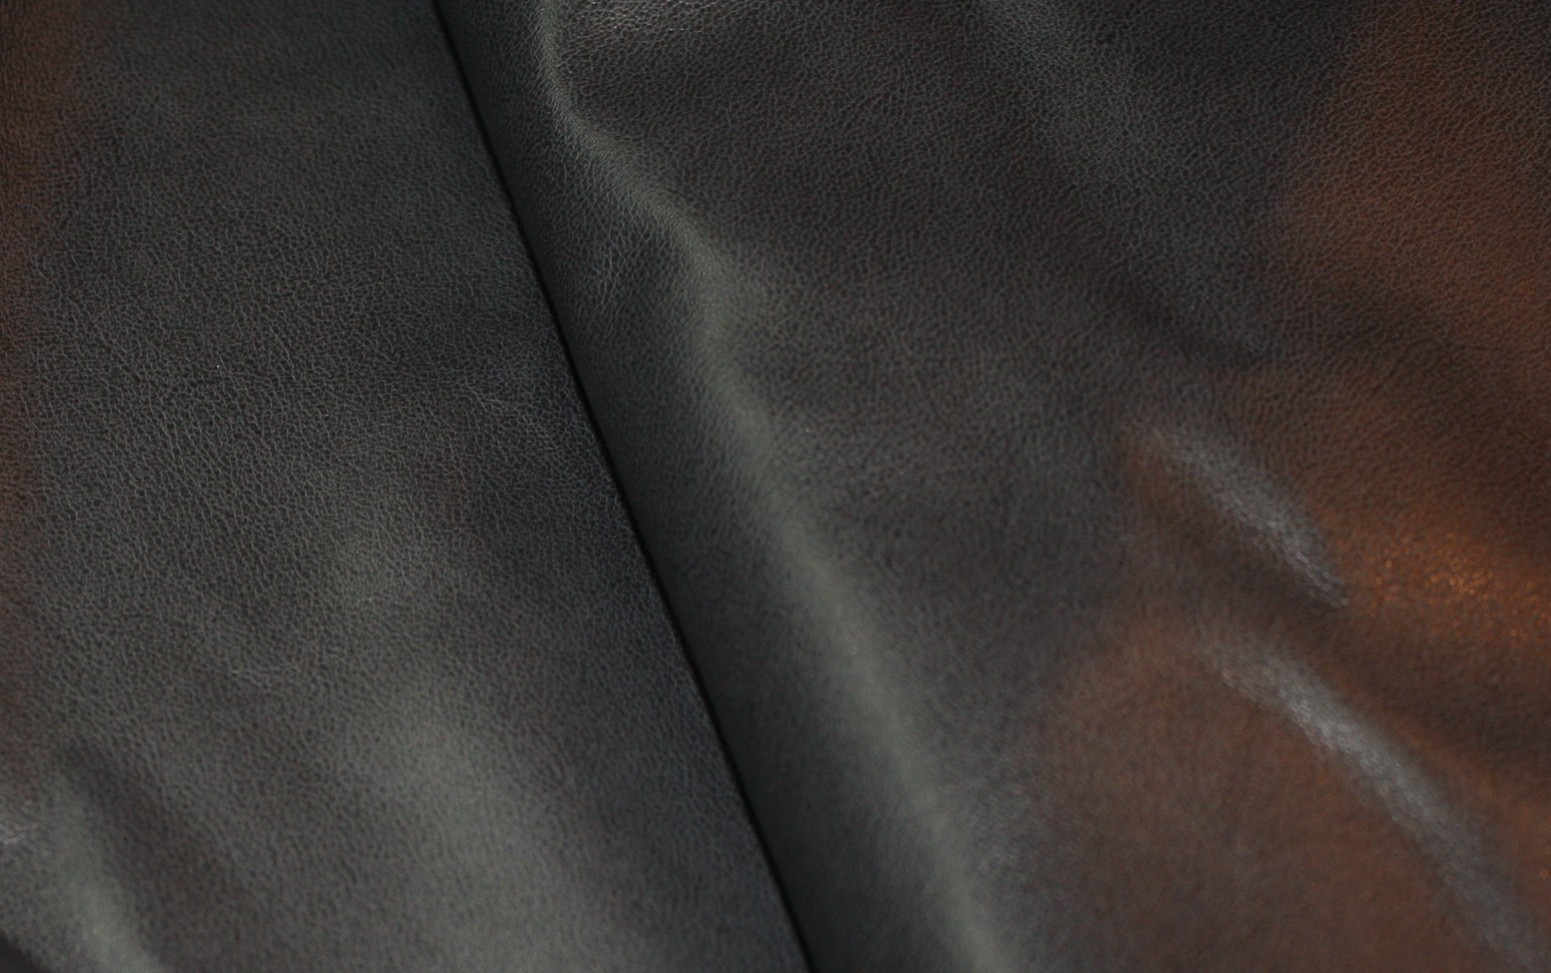
Check the fabric for flaws, especially in faux leather you might find scratches or cuts that you will need to work around when cutting out the pattern pieces.
Consider the weight and feel of the fabric for the design. For example a biker jacket will need a thicker fabric than say a peplum style jacket. Also, squeeze the fabric in your hand and if it has deep creases or wrinkles, that is how it will look after wearing it (better to know now :))
TIP 2. NEEDLES
Use a Leather Needle in the sewing machine. Start with a size 12 or 14 for light to medium weight fabric.
Go up to a 16 or 18 for heavier fabric, but be sure to CHECK your sewing machine as to what is the largest size needle it will accommodate. One of my older machines will only allow up to a size 14.
For sewing faux leather I prefer using a Jean Needle size 14. If you are having a problem with skipped stitches try this needle.
When it comes to hand-stitching, standard needles have a difficult time piercing the fabric. Instead use a Leather Hand Needle, this needle has a triangular point that pierces the fabric. Just be careful, the tip is REALLY sharp!
TIP 3: NO PINS
Just as difficult as it is to pierce leather / faux leather, once you do pierce the fabric the hole is there forever! Use clips to hold the fabric instead of pins. They are lightweight and don’t damage the fabric.
I got these getta grip sewing clips from my friend Paul Gallo. I met Paul at Craftsy while we were both shooting classes. He showed me these clips that he designed and I have been a fan ever since. Awesome guy! Have you ever met Paul or taken any of his classes?
FASHION DRAPING: DRESSMAKING BASICS with PAUL GALLO ON CRAFTSY!
FASHION DRAPING: BIAS DESIGN with PAUL GALLO ONLINE CLASS ON CRAFTSY!
TIP 4: TAPING SEAM ALLOWANCES
When sewing garments, pressing the seam allowances open with a Tailor’s Clapper is the best option. Unfortunately with leather, faux leather, vinyl, and suede, even if you safely press the fabric with an iron shoe, the seam allowance will not stay open. The best solution for securing seam allowances and hemming is either topstitching or leather tape (a special double-sided tape).
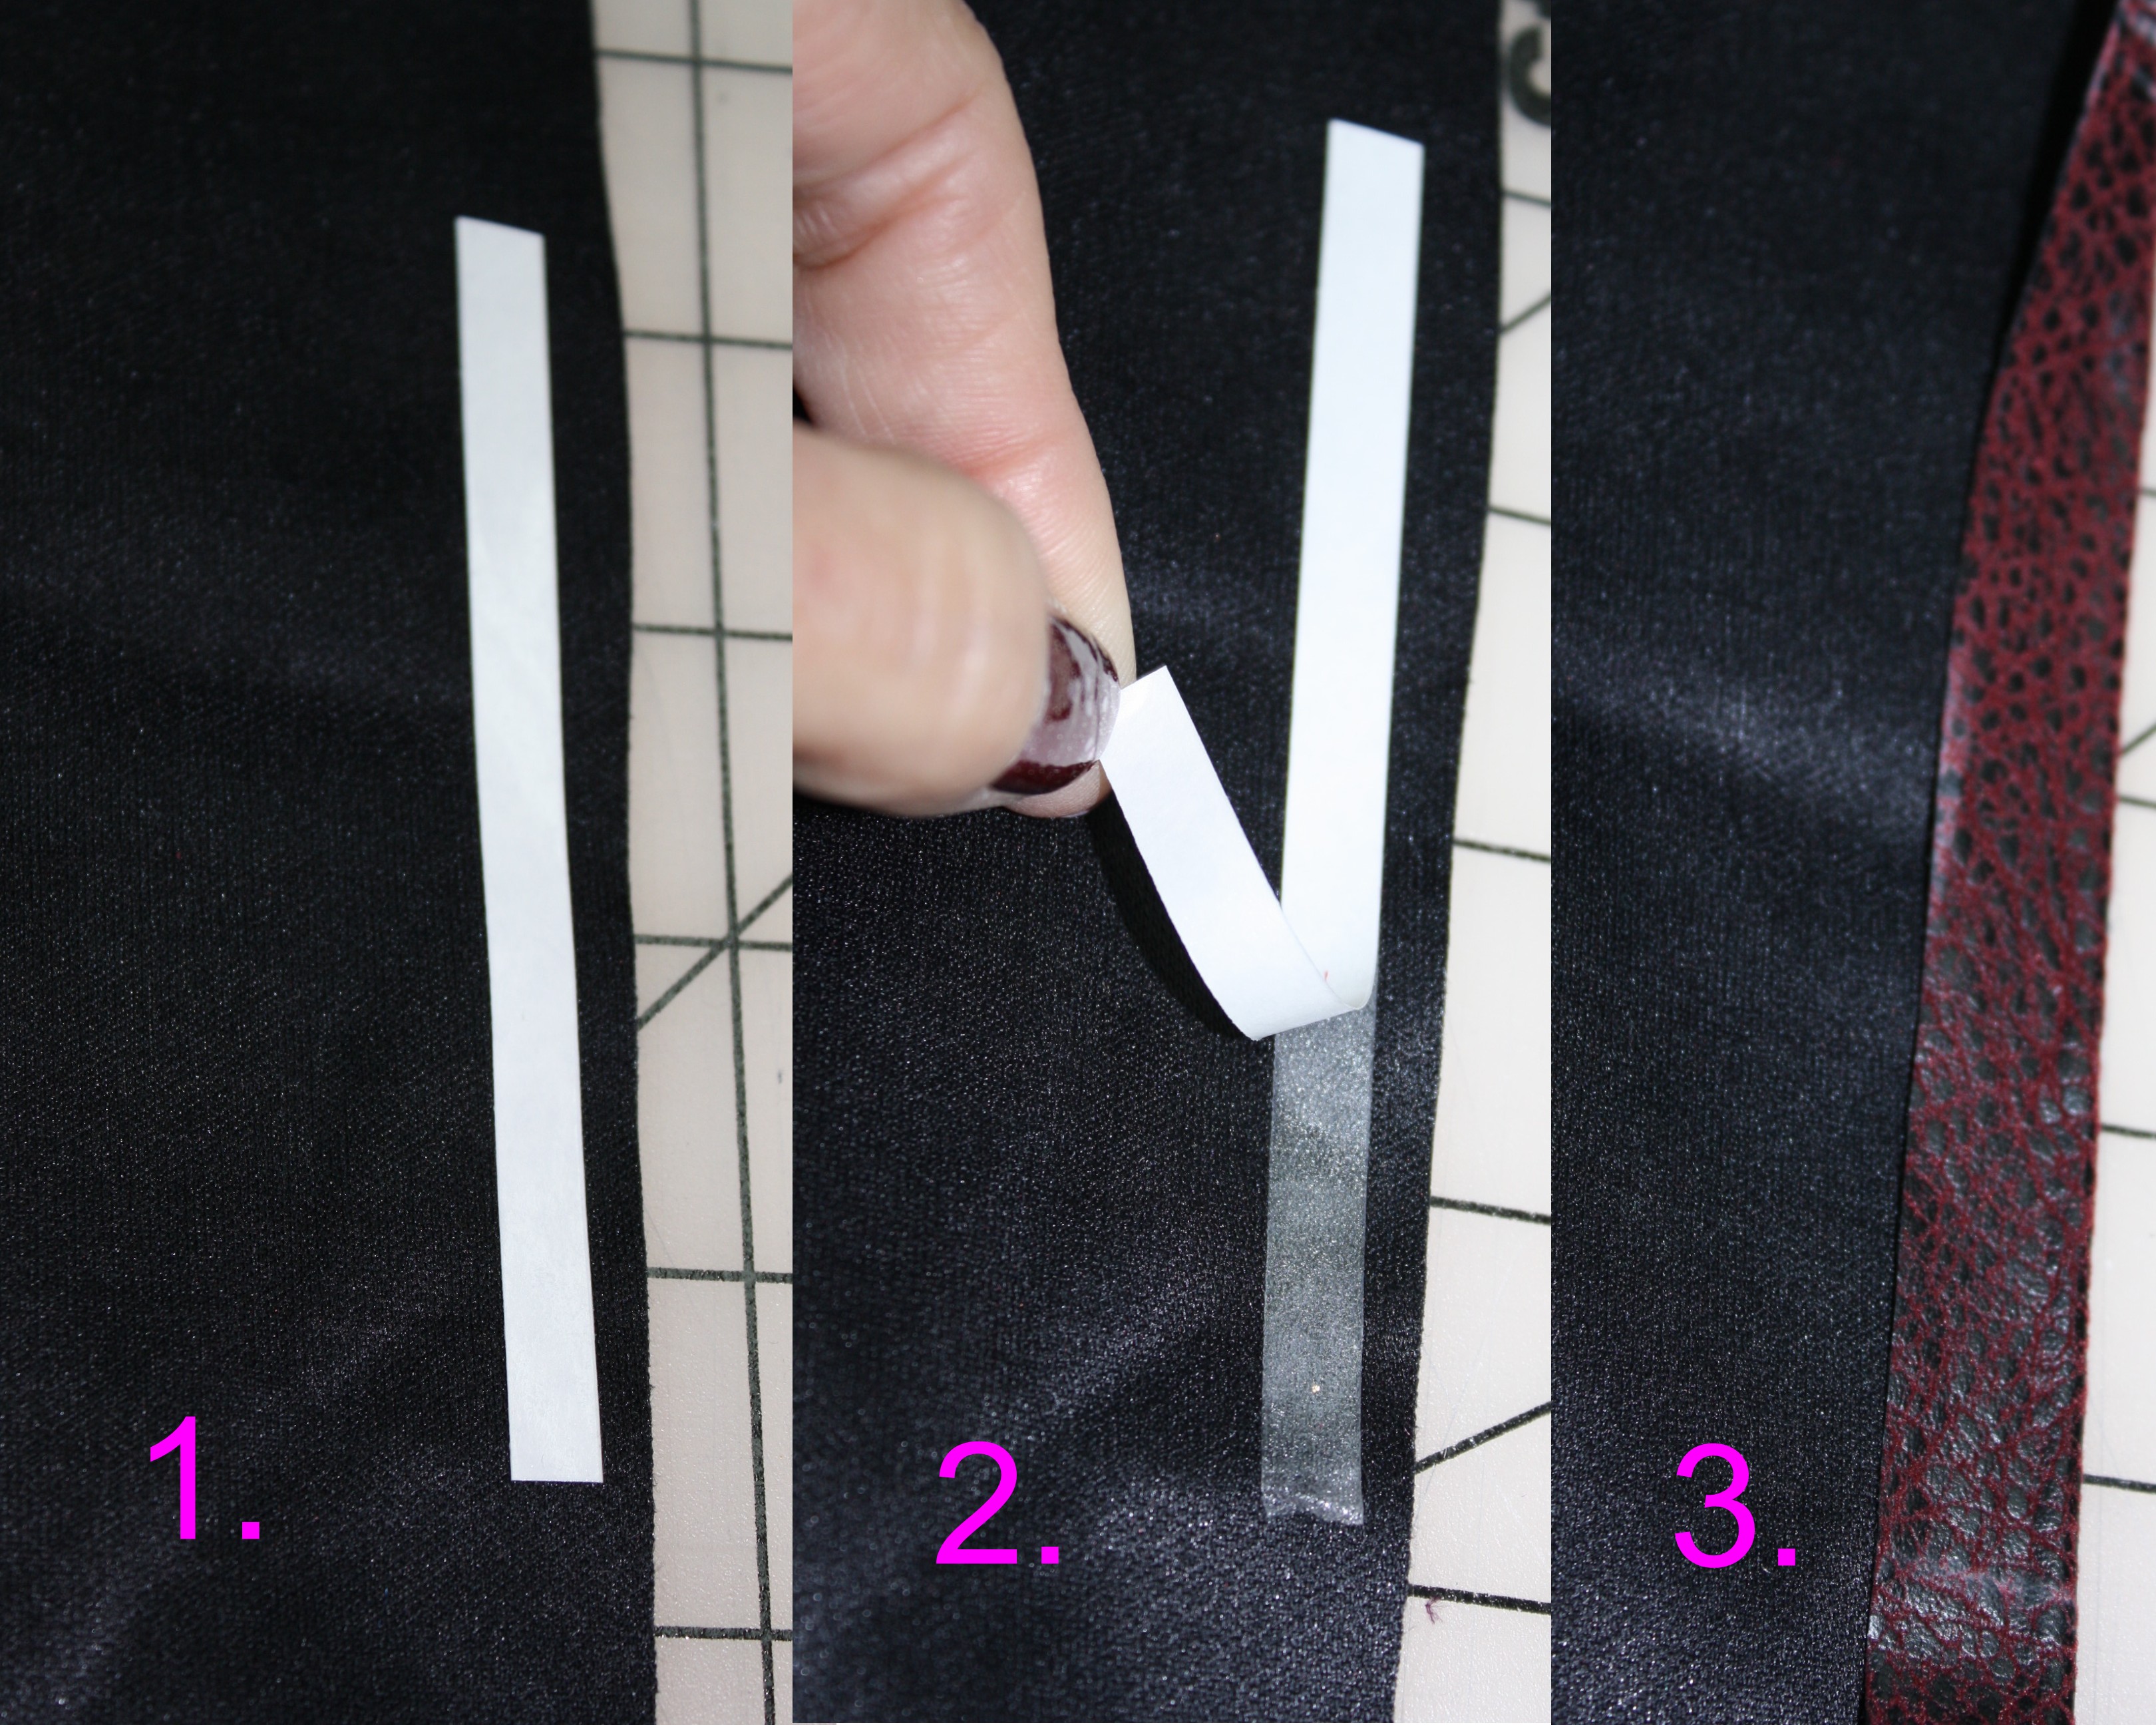
This is how easy it works:
1. Place a strip of LEATHER TAPE in the seam allowance with the sticky side down.
2. Remove paper backing, revealing the other side of the tape.
3. Fold back the seam allowance or hem allowance.
I use the 1/4″ wide tape for seam allowances and 1/2″ wide tape for hems. I purchase the tape from WAWAK SEWING and the rolls come 60 yards. Don’t be caught off guard by the quantity because you will use more than you think and the price is incredible! Well, this should get you started – next in line is quilting and embroidering faux leather.
I love sweaters and shawls, especially since I am always cold in the air-conditioned restaurants (not that we have needed air conditioning in Michigan this summer!). Thinking of the wardrobe challenge, sweaters are one of the items that I end up buying. Yes I do know how to crochet, yet trim on a jacket is about as far as that usually ends up. A small knitting machine sits in the corner of the studio (on my bucket list to learn how to use 🙂 ).
I was recently sewing a fringe skirt and the tweed scraps falling on the floor reminded me of meeting a women wearing a really cute, long, loosely woven (sweater looking) vest. It was at the annual conference for ASDP, so I had to ask the question that only sewer’s are allowed to ask each other “did you make that?”. She had indeed! I was really intrigued when she mentioned using water-soluble stabilizer and scraps from her last sewing project – yes, scraps!
Below is an example of using scraps from my tweed skirt:
Supplies needed:
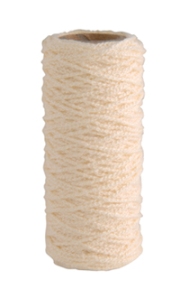
Decorative Yarn, tweed fabric threads, or other scraps
NOTE: WAWAK sewing has offered my readers a discount for July – yeah!
Purchase a minimum of $30 and receive 10% off your entire order – Use coupon code WAB714 when checking out (expires July 31st) Thank them when you order, they are the best! :))
Lay out one layer of water-soluble stabilizer (54″ for a scarf)
Randomly place yarn, scraps, hairy yarn, etc.
Place another layer of water-soluble stabilizer (same length as the first piece) on top of the yarns
Using long pins, pin through all the layers
Starting at one end, stitch down the center of the stabilizer, stitching through all the layers. Be careful not to sew through any pins, stitch all the way to the end. (Draw a straight line down the center if you need something to follow).
From the center, align the edge of the presser foot with the first stitched line. Stitch a second row, and a third, and 4th, until you get to about 1″ from the edge of the stabilizer. (If your machine has a Laser Vision Guide, like my BrotherDreamweaver, this would be the perfect application!)
Continue stitching rows along the entire length of the stabilizer until you have the desired width.
Turn the fabric and stitch a row from side to side, across the width of the stabilizer.
Continue to stitch row after row until the entire length is filled.
The width of the stitched rows depend on how tight you want the weave of the new fabric or lace. Just be sure to keep it somewhat tight or the yarns will fall away.
The next step is easy! Rinse the fabric panel in warm water and watch the water-soluble stabilizer disappear or throw the fabric in the wash on a hand-wash cycle, again with warm water.
Above you can see the stabilizer has disappeared and I am left with a loosely woven fabric. Notice the stitching lines, this is good to keep in mind when you choose the thread color.
Who would have ever guessed
our scraps
could go so far!
A few more tips:
Throw the fabric in the dryer to soften the hand
The stabilizer and yarns shrink up after washing and drying, keep that in mind if you need a specific length.
The more yarn and scraps, the thicker the fabric
To make an outfit, stitch all the pieces together before washing out the stabilizer
This is a great technique to use for June’s Fabricate Challenge – which I extended the deadline until July 31st.
Have you ever tried this? If so, please share any tips you might have!
Many of you have asked about the design on the cover of June’s wardrobe challenge and I can’t think of any better way to get back on the blogging roll. Where have I been hiding? Actually, I have been traveling quite a bit: some for work, visiting family, and of course getting a little fishing in.
I keep my blog notebook with me and write ideas and topics when the inspiration comes. The book is getting pretty full, so the good news is I am back from my trips and have caught up on all my crazy tight deadlines (what a breath of fresh air 🙂 ) and now I have the time to blog, yeah!
I have spent the last two weeks sewing and embroidering up a storm. I am excited to share what I have been working on and ready to get going on the wardrobe challenge … I need some summer clothes!
First, I have some great fabricating techniques to share with you; therefore, I am extending the deadline for June’s Challenge until July 31st. There will still be a separate July challenge, but with summer in most of our backyards, this will give you more time.
That definition pretty much leaves the door open for ultimate creativity, wouldn’t you say? One idea includes designing your own fabric or altering a fabric into something totally different, which is what I did with the above jacket.
The fabric used for the applique trimming is a polyester / satin. A lightweight fabric with fabulous drape, perfect for a blouse or lining (both of which I plan to add to jacket). That fabric, if left alone, would be a nightmare to create appliques or cut-outs, so I fabricated – sounds like a bad word 🙂 !
The trick – Heat N Bond, now available from my favorite place WAWAK Sewing and comes in 5 yard and 35 yard pieces. At first I wasn’t too sure about this stuff, but basically you iron it to the back of the fabric and it makes it easier for you to cut out an applique – especially if you are using the Brother Scan-n-Cut
This is how easy an applique can be:
Choose a design – for the sleeve I enlarged a design already in the scan-n-cut memory.
Place the bonded fabric onto the cutting mat (the paper backing on the heat –n-bond makes it easy to stick)
Press the start button (told you it was easy!)
Peel off the backing and place the appliques on the garment.
Once you have the perfect placement, use a press cloth and press the applique in place. Notice I attach the appliques before sewing the sleeve together.
Even though the cut of the scan-n-cut prevents the fabric edges from fraying, I still stitch the applique in place. I choose the blanket stitch and stitched around each applique. That took some time, but it looks great. Almost looks like leather!
I followed all those steps for the jacket front and again used a blanket stitch.
Of course I could cut these appliques by hand, but I really like the fact that all the front pieces are exactly the same! By the way, don’t look too closely at my studio – can you tell I have been working 🙂
Well, that’s one fun way to fabricate, much more to come. Have you ever tried appliqueing apparel?
A little creative serging! I mentioned I am finishing up a serging book. The book has challenged me to play with new threads, new stitches, new serging feet, and more. I wanted to share a quick serging stitch that you might find useful for restyling or adding embellishment to one of your outfits.
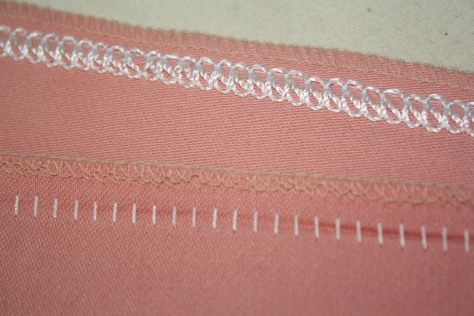
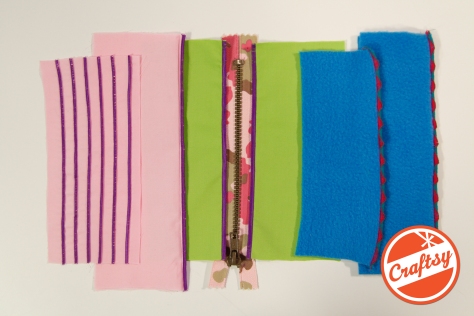
This is a 3-thread flatlock stitch with a decorative crochet thread in the upper looper. The left needle and lower looper have a similar color polyester thread. The photo above shows the front of the flatlock stitch and the backside. The backside looks like a ladder stitch. (the peach thread is just the serged edge of the seam).
I started with a basic gored skirt. The front has 2 seams and after I finished flatlocking those two seams I decided to add embellishment to the center front. So the center front really does not have a seam. This would be a great way to create unique fabric!
Here is the back view. Again there are 2 seams on each side back and this time there is a real seam down the center back with a hidden zip. In order for this stitching to look even, because of the zipper, I stitched the flat-felled embellishment down the edge of each center back seam, then added the zipper and closed the seam. That part got a little tricky and you can see the stitches are not perfectly even. I haven’t decided if I am going to rip it out and start again or hope nobody is looking at my tush that closely to notice 🙂
Stitch Tutorial:
Set your serger up for a 3-thread overlock – I will be using the Brother Project Runway 5434PRW and the standard setting for the needle and looper tensions are 4. When I give you new tension numbers you can compare this with your machine. If you are serging on the Babylock air-threading serger set up your serger for the 2-thread flatlock – wide.
Thread the upper looper (or the only looper for the 2-thread flatlock) with a decorative thread. Use standard poly serging thread in the needle and lower looper.
Next, there are a few changes to the serger settings:
Stitch Width: 5mm
Stitch Length: 2-4mm
Needle Tension: Decrease to 0 -3 (remember my standard setting is 4 so adjust for your serger)
Upper Looper Tension: Decrease to 2 – 3
Lower Looper Tension: Increase to 6 – 9
Disengage the knife
These setting serve as a guide. It will depend on the fabric and thread you end up serging with.
See if you have a Blind Hem Foot, if not you can use a standard foot.
There is a setting on the foot that moves to the right and left, allowing the needle to pierce more or less of the fabric. Test the stitch on your fabric to determine the setting.
Fold the fabric in half or if you are embellishing a seam, fold along the seam line. Align the fabric along the shield on the blind hem foot (if using a standard foot, mark a spot to align with).
The idea is for the needle to pierce the fabric – half the stitch is on the fabric and half is off the fabric. In fact the stitches look really messy coming out of the serger!
Stretch out the folded fabric to lie flat and press.
Pretty simple, but so fun! Have you ever tried this before? I would love some more ideas for decorative threads or yarns to use with this stitch.
Today is officially the end of National Serging month, did any of you pick up a good deal on a serger?
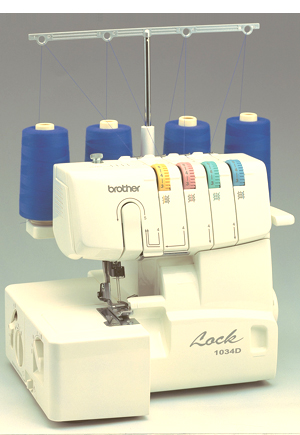
If you are thinking of adding a basic serger to the sewing room, really inexpensively, take a look at this Brother 1034D – on sale for $217 and free shipping! I had to double-check that, kind of thought it was a misprint 🙂 I have no idea how long the sale is on for or how many are in stock, but that is a great deal.
I will post March’s winners tomorrow evening. Don’t forget to get April’s photos posted on Flickr and share your pinterest board before Thursday! Good luck everyone 🙂
Looking for more creative serging ideas? Join my online class Creative Serging – Beyond the Basics. Click here to get 50% OFF today!
Getting new samples ready for It’s Sew Easy TV season 6 taping, I am finishing designing new dresses and experimenting with embellishing with embroidery. I have had this purple raw silk for years and really like the color, but it’s SO bright by itself! I will probably color block with black for one of the designs, but for this one I wanted to try adding a touch of embellishment. This is the start (obviously I have not pressed out the embroidery hoop marking) …
I found this flower in the Brother Quattro sewing machine. The flower was originally a medium size, so I tried to make it as large as possible for one of the flowers and as small as possible for the other. This was so easy to do! Using the touch screen I was able to enlarge the flower and move the design to the top left of the screen, which will embroider in the top left part of the hoop.
You can see below how the first larger flower is embroidering on the top left side of the hoop.
First flower looks great!
For the second flower – I turned the shape upside down, made the flower as small and narrow as possible, and moved the shape to the bottom right side of the hoop.
Looks pretty good!!!!! I used a silver metallic thread, although you can’t see that very well from the photo’s – clean and simple.
As far as designing, I cut the bottom of the dress to allow for a straight skirt or adding darts or pleats to the waistband. I am definitely adding the darts 🙂 I will post photos when the dress is finished.
Congratulations Wilma Coats the winner of my Creative Serging Class on Craftsy! Again, here is a coupon if you would like to join us in a fun, creative online class.
There is nothing more frustrating than sewing a gorgeous jacket with luxurious fabrics like faux fur, velvet, and leather (to name a few) and when it comes time to attach the lining to the facing, you end up with small puckers and an uneven feed – meaning one layer of the fabric ends up longer than the other. Well, I have great news for those of you that have the Brother PQ1500S.
You have already done the hard work sewing the jacket, why not use a few tools to make sewing the lining a breeze. The PQ1500 comes with an easy way to perfectly adjust your presser foot pressure and feed dog position, it’s color coded! Seriously, this takes all the testing and questioning out of the picture, heck you don’t even need to read the manual (which I know most of us are too busy to do :)).
First, look at the presser foot pressure indicator. You can see the color coding and the dial to adjust the presser foot height is on top of the machine. Simply turn it right and left to raise and lower, but here is the key … no more guessing where the height ends up. The colors on the indicator coordinate with the feed dog position and there is a fabric chart in the manual that you can use as a guide.
The main features I am going to show in this video involve the “pin feeding” that you will find in the feed dog position and the “fabric separator” that is used to join lining to the fabric. This is so easy you won’t believe it, so watch the video and if you want to see my previous post on how to mark and cut faux fur click here. Cheers 🙂 Angela
In my mission to come up with fun and unique fabric manipulations, I thought I would test out quilting (taking a short break from embroidery this week :)). And yes, I said QUILTING! I am not sure about you, but as a fashion designer when I hear the word “quilting” I typically cringe! It’s not that I don’t think quilts are beautiful and I sure wouldn’t want to offend all my friends that have a passion for this art (especially my mother :)) – but the fact of the matter is, the word itself makes many apparel sewer’s run the other way. The term quilting gives me an instant vision of cotton, LOTS of cotton, and bins of more cotton scraps that can be added to some project down the road. I know, I am so judgmental! I obviously overlook my bins of silk scraps that I know will fit into a pocket eventually.
But I think I should really take another look at this art, especially with fabric manipulation on the mind. Besides, who made the rule you can only quilt cotton. What about my favorite sewing technique, that is very Chanel inspired, where the silk charmeuse lining is “quilted” to the jacket fabric. Very luxurious and looks fabulous! Although we call it “Chanelism” not quilting. Go figure!
Or have you seen the quilted leather shown by Proenza Schouler – definitely on the short list for a fall must-have! Givenchy and Chanel both added some form of quilted leather to their collections. I really love the way you can use quilting to create a unique looking fabric or you can place the quilting in particular area of the garment to add a custom design element.
So, as to not risk ruining a large piece of luxurious fabric, I thought I would try a small sample. I am going to use silk charmeuse with batting and create Eye Candy (those of you that travel often will understand the name.) This only requires a little fabric and should be easy for testing the quilting method before I add quilted silk to a garment.
Start with 2 pieces of silk charmeuse and 1 piece of batting.
Pin together the layers.
Use clay chalk to mark a straight line, diagonally across the fabric.
I am going to start the first row of stitching using my laser-vision as a guide to follow my chalk line. Although, the light is a little hard to see, probably because I have the bright light turned all the way up on the machine – I swear I can get a suntan from the brightness LOL!
Then, using my foot as a guild, I am stitching row after row. I noticed that sewing at a medium speed with the MuVit foot works the best, in fact the same is true for the walking foot on my Quattro.
After quilting the entire piece of fabric, I laid my pattern on top of the quilted fabric and cut it out.
I added an elastic band to the back, pinning in place at each side.
That was very easy! In fact this was going to be a gift, but I think I might have to keep this one for myself 🙂 So you can see the technique of quilting is pretty easy and it does work on other fabrics besides cotton. I have a few more fabrics I am going to try, I will let you know how they turn out. But I can definitely see this quilted silk charmeuse used in a jacket or vest. If you any photos of fabric manipulation post them on flickr here is my link to share or add them to facebook! Inspire others by your creativity! Cheers, xoxo Angela
Brother™ has provided me with the DreamWeaver XE, but all opinions expressed are entirely my own.
Threads and Sew Stylish posted a blog with my tips on styling and sewing designer jeans. Check out my full article in the summer issue of Sew Stylish Magazine that hits shelves this month. If you have any questions or looking for fabulous denim fabric, send me a note. Cheers! Angela
Fashion Designer: Angela Wolf ... Photographer: Johnson-Rauhoff ... Models: Laine Lu VonBehren, Jennifer Knapp, Jenna Warren ... Hair & Makeup: Shawn Frandsen and Sarah Schilling
If you saw my post a few months back, I showed off a few pieces of gorgeous faux fur that I bought at Haberman Fabrics. Well, I promised to give a rendition of the experience of sewing with faux fur and hopefully pass on a few lessons. I must admit this time around seemed so much easier than I remember. One of my first faux fur jackets, a thick white shaggy fur … I still have visions of coughing up fur balls for weeks, right alongside my cat. Not only that, I ended up with white fuzz/fur all over my clothes for weeks!
Either the furs are easier to sew or I learned a few lessons from the first episode. So here are a few tips:
Trace your pattern, with clay chalk onto the back of the faux fur. (I love the backing on this fur!)
Use sharp scissors! Start cutting from the back. Slide your scissor tip between the faux fur and the backing and cut in small snips, being carful to only cut the backing and not the faux fur.
I use Kai Scissors. These scissors are so sharp, I can literally slide the tip of the scissors right around the pattern pieces. (They work great when trimming Sherpa fabric as well).
Notice that I am only cutting the backing, leaving all the faux fur intact. Cut small snips at a time.
I used the salvage as the front seam and then folded it back and tacked it in place.
Trim your seam allowances. This really does not take long, again my Kai Scissors worked fantastic. I read that I should try an electric razor, but this worked perfectly. Maybe, I’ll try the razor next time 🙂
You can see here the seam allowance is all trimmed and ready to sew. That was it! I used the same process on all of the faux furs.
All in all, I really enjoyed sewing up these faux furs and believe it or not, one quick vacuum and the studio was back to normal. Although, I must confess, I could not part with the cute little faux fur scraps. So I have decided to use them as bows on my Christmas gifts 🙂
Fashion Designer: Angela Wolf ... Photographer: Gregg Rizzo ... Model: Dawn Yarborough ... Hair & Makekup: Shawn Frandsen & Sarah Schilling


 I love sweaters and shawls, especially since I am always cold in the air-conditioned restaurants (not that we have needed air conditioning in Michigan this summer!). Thinking of the wardrobe challenge, sweaters are one of the items that I end up buying. Yes I do know how to crochet, yet trim on a jacket is about as far as that usually ends up. A small knitting machine sits in the corner of the studio (on my bucket list to learn how to use 🙂 ).


 Decorative Thread Ideas:


![00180fullscreen[1]](https://angelawolf.wordpress.com/wp-content/uploads/2013/05/00180fullscreen1.jpg)


