Tag Archives: #wardrobechallenge

THANK YOU SO VERY MUCH!!!!! Just one more round to go!

I just got back from a 6 day Sit & Sew tour visiting all the Allbrands stores which started in Louisiana and ended in Texas.  Fabulous trip, but definitely dragging a little today.  I will be sharing details of the week as soon as I organize all the photos.  In short, I met so many wonderful people, ate some amazing food, got over my fear of bridges, I now have official Mardi Gras beads …

the bridge

In the meantime, I posted this message to facebook and realized not all of you are on facebook, so I thought I would THANK YOU again.

2015BlogAwards_600x2004Saturday was the last day of teaching and I was flying out the next morning.  Super tired, but before crashing I decided to scan my emails and came across one from Craftsy with the title “Are you a blogger award finalist?”.  I clicked on the link and couldn’t believe it!   You nominated my blog to the top 4 Best Sewing Instructor Blog again.  You all are AWESOME!  This means so much to me, thank you, thank you.  I also know it is a little work to nominate a blog at the first stage, you have to fill out a lot of things.  Thanks so much for going through the effort, you inspire me to keep at it 🙂

One More Round of Voting

Now, there is a last round of voting that ends Wednesday at badge 2015midnight.  This vote is quick and easy:

  • Click here to vote:   Scroll down the page to Vote Now! Best Craftsy Sewing Instructor’s Blog and you will see my name.  Vote and then watch the tally live.

Just being in the top 4 is such an honor and knowing it’s because of your effort to nominate me really makes my day and a huge THANK YOU is all I can say!  By the way, while you are scanning the page you might want to check out a few of my friends blogs that also made the top 4 in their category:  Leah Day has a great one for quilting and  Lisa Shaw in Embroidery.

WARDROBE CHALLENGE

stars

The 2014 Wardrobe Challenge was so much fun!  Seeing your outfits on flickr and following your Pinterest boards has been a treat and a quick way to get in the sewing mood, I hope you have enjoyed it as much as I have.   There have been a few hiccups on my end, so thanks for your patience.  (Note to self:  Never plan anything while I am traveling to teach, tape It’s Sew Easy, or shoot online  classes – just not enough time and brain space )  In fact, I still need to post the list of winners, but I wanted to give you the last challenge.

LAST CHALLENGE

I told you the last challenge would be an easy one.  Take a picture of the clothes in your closet that you have sewn this past year and post it on Flickr before February 15th (the same way you posted the other photos – click here if you need help uploading to flickr).  Even if you only have 1 garment, your photo qualifies you for this last challenge.  Winners will be all random drawings from the entrants, so even if you haven’t participated yet or you feel intimidated by the rock stars who have really used the challenge to fill their closet, let us see what you have made.  Again this is just 1 photo, just like mine.  Good luck and thanks again to all that have participated.

I don’t know if you read my last post about the cooking adventure, 2but many of you gave the best tips for cleaning the pan!  the baking soda worked like a charm and I wrote all the cleaning tips down so I am ready for the next burn.  Well, I am off to edit pictures and explain to Winn how I got my mardi gras beads 🙂

Cheers and one last thank you,

Angela Wolf


Are your photo’s showing up on Flickr? Wild Card Entries in the Wardrobe Challenge!

WILD CARD ENTRIES
You will notice August and September offered a Wild Card entry and there are a few reasons for this:

Wild Card

NEED HELP JOINING FLICKR?

Many of you have emailed needing help with Flickr, which is the primary method of entering the contest.  Hopefully you are getting the hang of it now, but in all fairness, if any of you need help setting up your Flickr or navigating around the site, please let me know and I will be more than happy to help you get started.

ARE YOUR PHOTOS SHOWING UP ON THE WARDROBE CHALLENGE FLICKR GROUP? 

More importantly, are your photos showing up in the Wardrobe Challenge Flickr page?  As you upload a photo for a certain challenge, make sure that you click on “add to groups” (on the left hand side) and then click on “Angela Wolf’s Wardrobe Challenge”.  After the photo is uploaded, click on the Wardrobe Challenge Flickr Group page and make sure your photo is there.  If you don’t see your photo on the group page, the judges don’t either.  Again, let me know if you need help with this, and I would be more than happy to help.

WHAT’S A WILD CARD?

The idea for this challenge is to inspire people to sew garments and fill their wardrobe with your own designs.  Of course I can’t possibly add a theme that suits everyone, so the Wild Card entries are in case you want to sew a garment outside of the themes.  Just add “Wild Card” to the description of your garment along with either the month “August” or “September” (again check that it show up on the Flickr page) and your entry will qualify for the month indicated.  Wild Card entries will be judged at the close of the official challenge and must be received by January 31, 2015.  Yes I did say January 31, 2015 – read below for details.

ON A PERSONAL NOTE …

I would like to thank everyone for participating in my wardrobe challenge.  So far, the garments are fabulous and the Pinterest page is fun too, what a great place to share inspiration!  The idea of filling my closet with my own hand-sewn apparel is a mission of mine (hope I live a long time to fulfill that one 🙂 )  and my wish is to inspire you to do the same.  I could have called this challenge a blog-athon or sew-along, but I chose to go out on a limb and ask some of my favorite sewing businesses to donate gifts and prizes – which they so generously offered; thus creating a full-blown contest.  The response has been phenomenal and I have enjoyed every bit of watching what you all are working on.  But with any long-term contest or event, some changes need to be made in order to better the experience for all involved.

This is the reason for August Wild Card month:  As I mentioned many of you were struggling with the Flickr group, I was waiting for others to reply to our emails about winning past challenges, and a few other kinks that needed to be worked out.

This was not the reason for September’s Wild Card:  I don’t usually share my personal life too much, but I think this one is important.  Labor Day weekend I was notified of my Grandmother entering the hospital.  Although it didn’t seem serious at first, she passed away shortly after.  My Grandmother was my best friend.  After losing my Grandfather 2 years ago, this was almost unbearable.

100_4443


Those of you that know me will attest that I always take all my work seriously and give 100%, if not more – even if it’s donating time working on my Wardrobe Challenge or helping a fellow sewer with a sewing dilemma.  There is a fine line though; my family comes first and always will.  So during this difficult time, which has been very emotional for me, I stepped away from the office for a short period to be with family.

On a positive note, last week I taught at the American Sewing Expo, which is as invigorating as it gets. So many of you came up and showed off your new outfits that you have been sewing in the Wardrobe Challenge.  Thanks, you really made my day and reminded me of why this challenge is going on.  So now you have 2 chances at a Wild Card Entry 🙂

2facebook ad

Not only that, I am extending the contest to January 31, 2015 – simply because of the Holiday’s.  Please remember this challenge is supposed to be fun and inspiring!  Now, for those that like zippers, October’s challenge is “All Zipped Up” and I have some exciting tutorials on inserting zippers coming your way this month.

cheers,

Angela Wolf

Designer Wardrobe Challenge – Fabricate with Applique!

win-n-angel fishingMany of you have asked about the design on the cover of June’s wardrobe challenge and I can’t think of any better way to get back on the blogging roll. Where have I been hiding? Actually, I have been traveling quite a bit: some for work, visiting family, and of course getting a little fishing in.

I keep my blog notebook with me and write ideas and topics when the inspiration comes. The book is getting pretty full, so the good news is I am back from my trips and have caught up on all my crazy tight deadlines (what a breath of fresh air 🙂 ) and now I have the time to blog, yeah!

I have spent the last two weeks sewing and embroidering up a storm. I am excited to share what I have been working on and ready to get going on the wardrobe challenge … I need some summer clothes!

logo june blog

June’s Challenge – Fabricate!

First, I have some great fabricating techniques to share with you; therefore, I am extending the deadline for June’s Challenge until July 31st. There will still be a separate July challenge, but with summer in most of our backyards, this will give you more time.

Fab-ri-cate (from dictionary.com unabridged – based on the Random House Dictionary)

  1. To make by art or skill and labor; construct
  2. To make by assembling parts or sections
  3. To devise or invent
  4. To fake; forge

20140129_114223

That definition pretty much leaves the door open for ultimate creativity, wouldn’t you say? One idea includes designing your own fabric or altering a fabric into something totally different, which is what I did with the above jacket.

_MG_9048

The fabric used for the applique trimming is a polyester / satin. A lightweight fabric with fabulous drape, perfect for a blouse or lining (both of which I plan to add to jacket).  That fabric, if left alone, would be a nightmare to create appliques or cut-outs, so I fabricated – sounds like a bad word 🙂 !

heat and bondThe trick – Heat N Bond, now available from my favorite place WAWAK Sewing and comes in 5 yard and 35 yard pieces. At first I wasn’t too sure about this stuff, but basically you iron it to the back of the fabric and it makes it easier for you to cut out an applique – especially if you are using the Brother Scan-n-Cut


This is how easy an applique can be:

Angela Wolf Sewing Scan n Cut Brother1

  • Choose a design – for the sleeve I enlarged a design already in the scan-n-cut memory.
  • Place the bonded fabric onto the cutting mat (the paper backing on the heat –n-bond makes it easy to stick)
  • Press the start button (told you it was easy!)

Angela Wolf Sewing Scan n Cut Brother9

IMG_7655

Peel off the backing and place the appliques on the garment.

Angela Wolf Sewing Scan n Cut Brother10

Once you have the perfect placement, use a press cloth and press the applique in place.  Notice I attach the appliques before sewing the sleeve together.

Angela Wolf Sewing Scan n Cut Brother14

Even though the cut of the scan-n-cut prevents the fabric edges from fraying, I still stitch the applique in place. I choose the blanket stitch and stitched around each applique. That took some time, but it looks great.  Almost looks like leather!

20140128_134419

I followed all those steps for the jacket front and again used a blanket stitch.

20140129_114209

Of course I could cut these appliques by hand, but I really like the fact that all the front pieces are exactly the same! By the way, don’t look too closely at my studio – can you tell I have been working 🙂angela wolf #wardrobechallenge


Well, that’s one fun way to fabricate, much more to come.  Have you ever tried appliqueing apparel?


Cheers,

Angela Wolf

Compare: Rolled Hem Foot, Ball Hemmer Foot, and Spring Hemmer Foot on an Industrial Sewing Machine

How to sew a double fold narrow hem DIY26There are so many sewing machine feet to choose from, it can get overwhelming deciding which foot is best for the job.  Why bother, right?  If using a specific foot for a specific job could drastically cut the sewing time down and offer professional looking results, wouldn’t you want to try?  I sure would.

Home sewing machines usually come with a fabulous manual explaining what each foot is for and a tutorial explaining how to use it.  Industrial machines don’t always offer such advice, at least mine didn’t.  With a 5 page manual, written in a language I don’t speak, I am surprised I got the thing put together in the first place!  I don’t use this machine as frequently as all the others, mainly because it’s loud, doesn’t have a thread cutting feature and I don’t have any accessories for it.  I bought it for speed and that it has.

Scanning the list of additional feet for industrial machines, I found the feet to be are very inexpensive, but again I ran into the issue of which foot is the right foot for the job.  I thought I would start testing some of these feet and share with you my findings.

A Narrow Rolled Hem

I sew a lot of garments with sheer fabrics (especially this months wardrobe challenge;  Dress the Part) and my go-to stitch is usually a narrow rolled hem on the serger – its super fast and looks professional.  But sometimes a rolled hem on the sewing machine would be more appropriate. I found 3 different feet for the industrial machine:

How to sew a double fold narrow hem DIY49

From left to right: Rolled Hem Foot, Ball Hemmer Foot, Double Fold Spring Hemmer Foot

Rolled Hem Foot

You have probably seen the Rolled Hem Foot, as it comes with most home sewing machines.  This is the only foot I had ever seen used for the job.  It does make a rolled hem easy, but has its challenges as well.  Getting over thick seams can be interesting and sometimes the fabric doesn’t feed evenly.  Of course there are tricks:How to sew a double fold narrow hem DIY35

  • Hold the fabric to the left side of the foot as it feeds into the machine and trimming seam allowances for less bulk.


How to sew a double fold narrow hem DIY28

Results:  A nice rolled hem, I had to use the tweezers to get the fabric started and the rolled hem is a little uneven.  With practice this foot will work.

If you have an industrial machine, you have more options and each offers different results:

Ball Hemmer Foot

How to sew a double fold narrow hem DIY5

This foot has a plate that covers the front feed dogs allowing the fabric to feed perfectly.  You can see the ball at the tip of the foot, the fabric will roll over that ball as it double folds into a narrow hem.  I must say, I love this foot!  This is how it works:

How to sew a double fold narrow hem DIY6

  • Feed the fabric into the foot, above the plate.  Notice how the place covers the front feed dogs. Insert the fabric the same way you would for the rolled hem foot.

How to sew a double fold narrow hem DIY8

  • The fabric folds over the ball.

How to sew a double fold narrow hem DIY9

  • Hold the fabric a little to the left side of the foot as the fabric feeds into the foot (as shown above).  Stitch.

How to sew a double fold narrow hem DIY18

  •  Results:  A perfect narrow hem!  This foot offers the easiest rolled hem I have ever tried!  I hardly had to do anything with the fabric except guide it into the foot.  I even sewed at a high-speed and the rolled hem is perfectly even.  A definite A+++++

Double Fold Spring Hemmer Foot

How to sew a double fold narrow hem DIY13

The “spring” part is what intrigued me about this foot.  You can see the foot looks very similar to the Ball Hemmer Foot, yet there is not a ball.  Instead, there is a movable area that the fabric will go through. Look closely, this is the back of the foot:

How to sew a double fold narrow hem DIY100

Looking at the left photo first: see the corner touching my finger tip.  When I do nothing with that corner, the opening on the foot remains unchanged (see opening at yellow arrow).

Take a look at the right photo:  Here I have pushed that corner in and the opening gets larger (see yellow arrow).

Now we know what the “spring” means.  This opening adjusts for the thickness of fabric as the fabric flows through.

How to sew a double fold narrow hem DIY15

  • There is a plate protecting the fabric from the front feed dogs, just like the ball hemmer.  Slide the fabric on the top of the plate.

How to sew a double fold narrow hem DIY16

  • Again, feed the fabric into the foot and stitch.

How to sew a double fold narrow hem DIY24

Results:  Another perfect rolled hem!  Just as easy as the ball hemmer foot.

My favorite foot for the rolled hem on silk charmeuse is the Ball Hemmer Foot. The rolled hem was a little thicker than the other two and perfect!

How to sew a double fold narrow hem DIY5

What about crossing seams and thicker fabrics?  I will test these and more, and let you know the results.  So far both feet are winners!

I also have to check to see if these feet will work on my Brother PQ1500.  The PQ1500 straight stitch machine is just like an industrial machine with speed and ease of use, plus it’s not attached to a large table and easy to move around.  Fingers crosses on that one!  Otherwise, I have my eye on the Brother Industrial Machine used on Project Runway.  Do you have an industrial machine? Have you tried these rolled hem feet?

Cheers!

Angela Wolf


New Challenge – Dress the Part! Winners Announced

Angela Wolf May 2014 Wardobe Challenge

May starts, what I call, the “party season”. Graduation parties and wedding festivities are forefront on the invitation lists, then we move into garden parties, yacht club parties, fashion shows, … and so much more. Please tell me you are like me – scrambling at the last hour for something fun and fashionable, then wishing I would have taken the time to sew something new ( just because I design and sew for a living doesn’t mean the closet is full – have you ever heard of the shoe-maker with no shoes J) Not saying my closet is not full, it’s full of business and casual wear. When it comes to party attire, the closet could use some MAJOR improvement.

The challenge for May is to plan ahead and add some party attire to the wardrobe. Parties don’t always require cocktail dresses and fun skirts (although that is what I am going to focus on), maybe a simple pair of silk pants with a sequin top. This is exactly why I am calling the challenge Dress the Part.

angelawolffringeskirt14441

Here is the rundown of prizes for May and Thanks again to our sponsors!  Brother, WAWAK Sewing, Threads and Sew Stylish Magazine, It’s Sew Easy TV, and ABO APPAREL.

The challenge again is on Pinterest and Flickr (Click here if you are new to the challenge).

Pinterest is such a great place to share ideas, meet people who have a common interest, and look for inspiration. The reason for Pinterest being part of the challenge, is that you can go the wardrobe challenge board, not only follow other people with the same interest, but when you search for #wardrobechallenge – you will see what inspires others. There is no right or wrong wardrobe challenge board, as long as you follow the simple guidelines below (which is why the pinterest boards are now random drawing).

Random drawing from the Pinterest board (must follow every Pinterest item below to qualify):


pinterest

Pinterest Contest Rules:


  • Create a board titled “Wardrobe Challenge 2014”. (If you participated in a previous month you already have these 2 steps finished)
  • Pin inspiration and sewing tips for outfits to wear to the graduation and wedding parties!
  • Pin this image and include at least one new pin from each sponsor, add hashtag #wardrobechallenge

As you get going on May’s pinning, post a comment on this pin with a link to your Wardrobe Challenge board. (Enter before May 31, 2014)


And Congratulations to the March winners!!!!!

  • Overall Winner and winner of the 1 year Thread Insider Membership: flickr username amydahdah     Check out her flickr page – I would wear every pair of those jeans!

Winner March 2014 #wardrobechallenge

  • $50 Gift Card to WAWAK Sewing

Flickr name: Shawn Hiestand – hairyfroggrafix – unique jeans and very professional looking inside and out!

#wardrobechallenge

  • One Pattern, Many Ways Vol. 1 DVD

Flickr username: Deb Schimmel – Best Distressed Jeans!

  • It’s Sew Easy Season 5 DVD

Flicker username: Vgladysdillon – Creative topstitching, a little distressing, and most unique pockets! Can you tell what team she likes? J

  • A surprise gift package from Coats

Deborah Bowles – excellent fit and fun back pockets

  • Angela Wolf’s online class: Sewing Designer Jeans

Pinterest username: Lisa Marshall

  • Angela Wolf’s Sewing Designer Jeans DVD as seen on It’s Sew Easy TV!

Pinterest username: Dawn Ramsdell – Cross –   Pinterest board full of decorative pockets!!!!

Winners email us at info@angelawolf.com for info on receiving your prize.

Well, do you have any parties to plan for?  What are you going to sew for May’s challenge?

xoxo

Angela Wolf

Creative Serging with Crochet Thread – Flatlock Stitching!

A little creative serging! I mentioned I am finishing up a serging book. The book has challenged me to play with new threads, new stitches, new serging feet, and more. I wanted to share a quick serging stitch that you might find useful for restyling or adding embellishment to one of your outfits.

How to sew with creative serging -  Angela Wolf

This is a 3-thread flatlock stitch with a decorative crochet thread in the upper looper.   The left needle and lower looper have a similar color polyester thread.  The photo above shows the front of the flatlock stitch and the backside.  The backside looks like a ladder stitch.  (the peach thread is just the serged edge of the seam).

How to sew with creative serging - Angela Wolf

I started with a basic gored skirt.  The front has 2 seams and after I finished flatlocking those two seams I decided to add embellishment to the center front.  So the center front really does not have a seam.  This would be a great way to create unique fabric!

How to sew a creative serged seam with Angela Wolf

Here is the back view.  Again there are 2 seams on each side back and this time there is a real seam down the center back with a hidden zip. In order for this stitching to look even, because of the zipper, I stitched the flat-felled embellishment down the edge of each center back seam, then added the zipper and closed the seam.  That part got a little tricky and you can see the stitches are not perfectly even.  I haven’t decided if I am going to rip it out and start again or hope nobody is looking at my tush that closely to notice 🙂

Stitch Tutorial:

  • Set your serger up for a 3-thread overlock – I will be using the Brother Project Runway 5434PRW and the standard setting for the needle and looper tensions are 4.  When I give you new tension numbers you can compare this with your machine.  If you are serging on the Babylock air-threading serger set up your serger for the 2-thread flatlock – wide.
  • Thread the upper looper (or the only looper for the 2-thread flatlock) with a decorative thread.  Use standard poly serging thread in the needle and lower looper.


crochet thread wawal
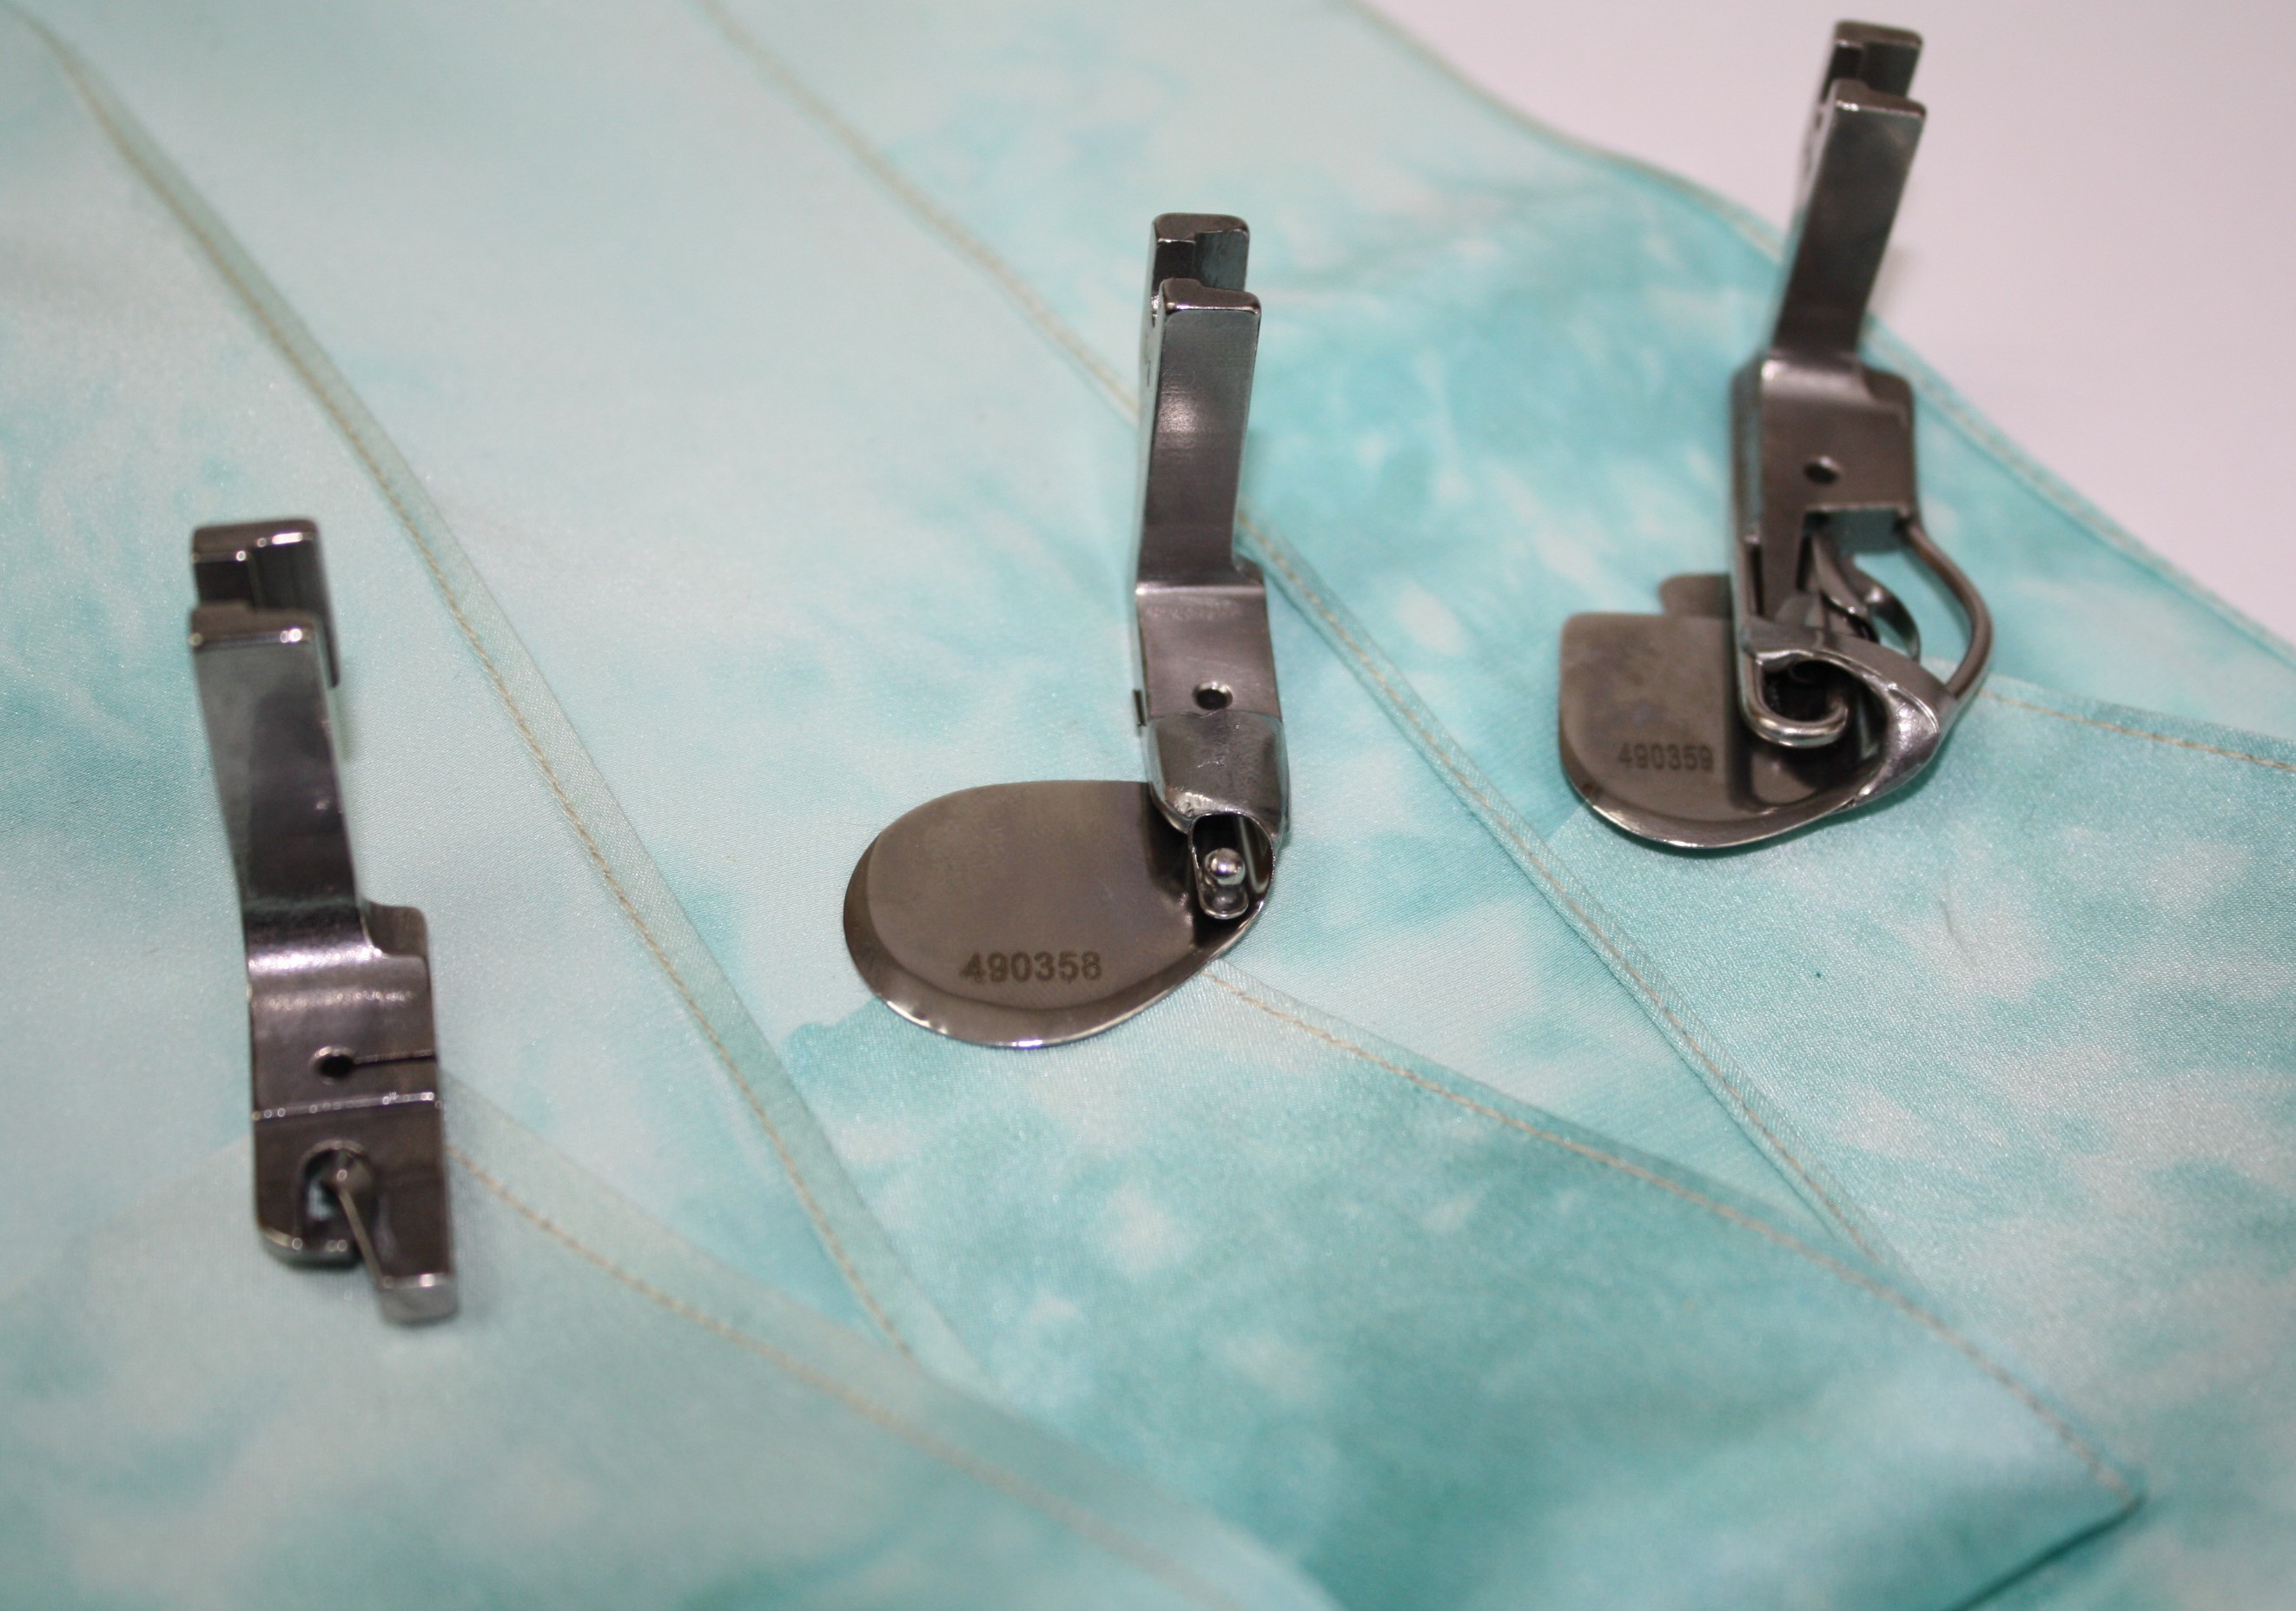
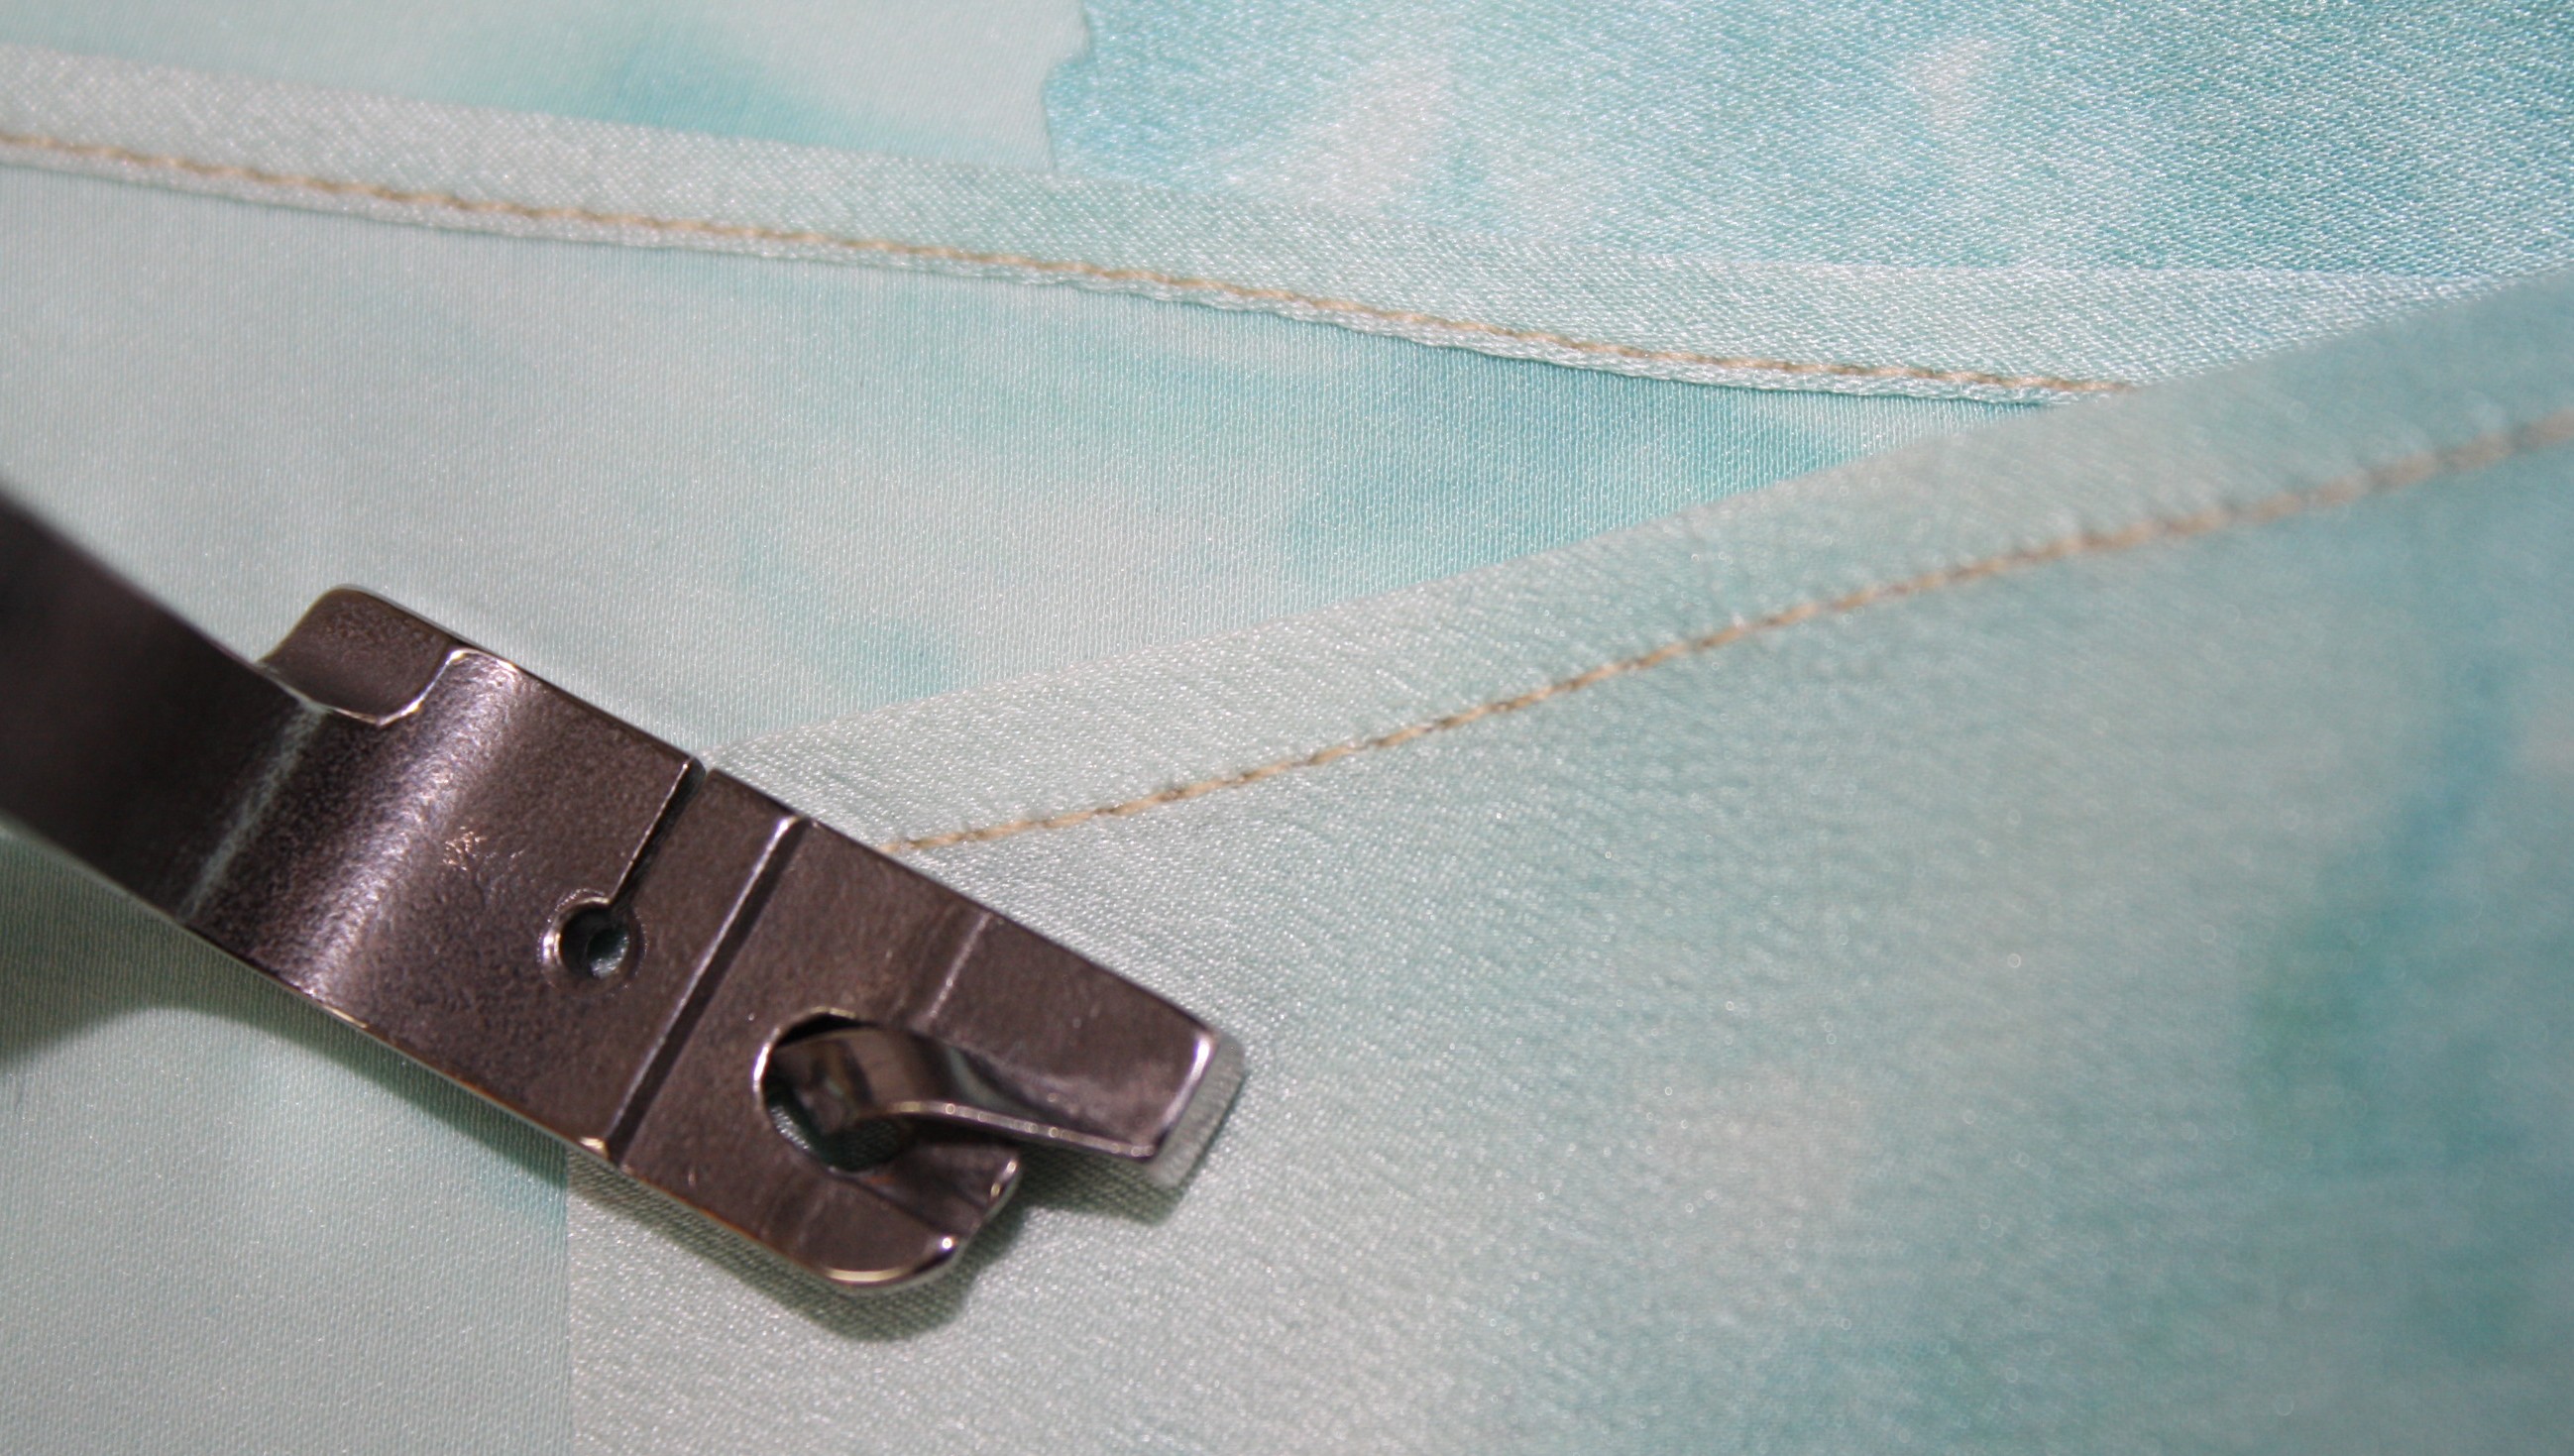
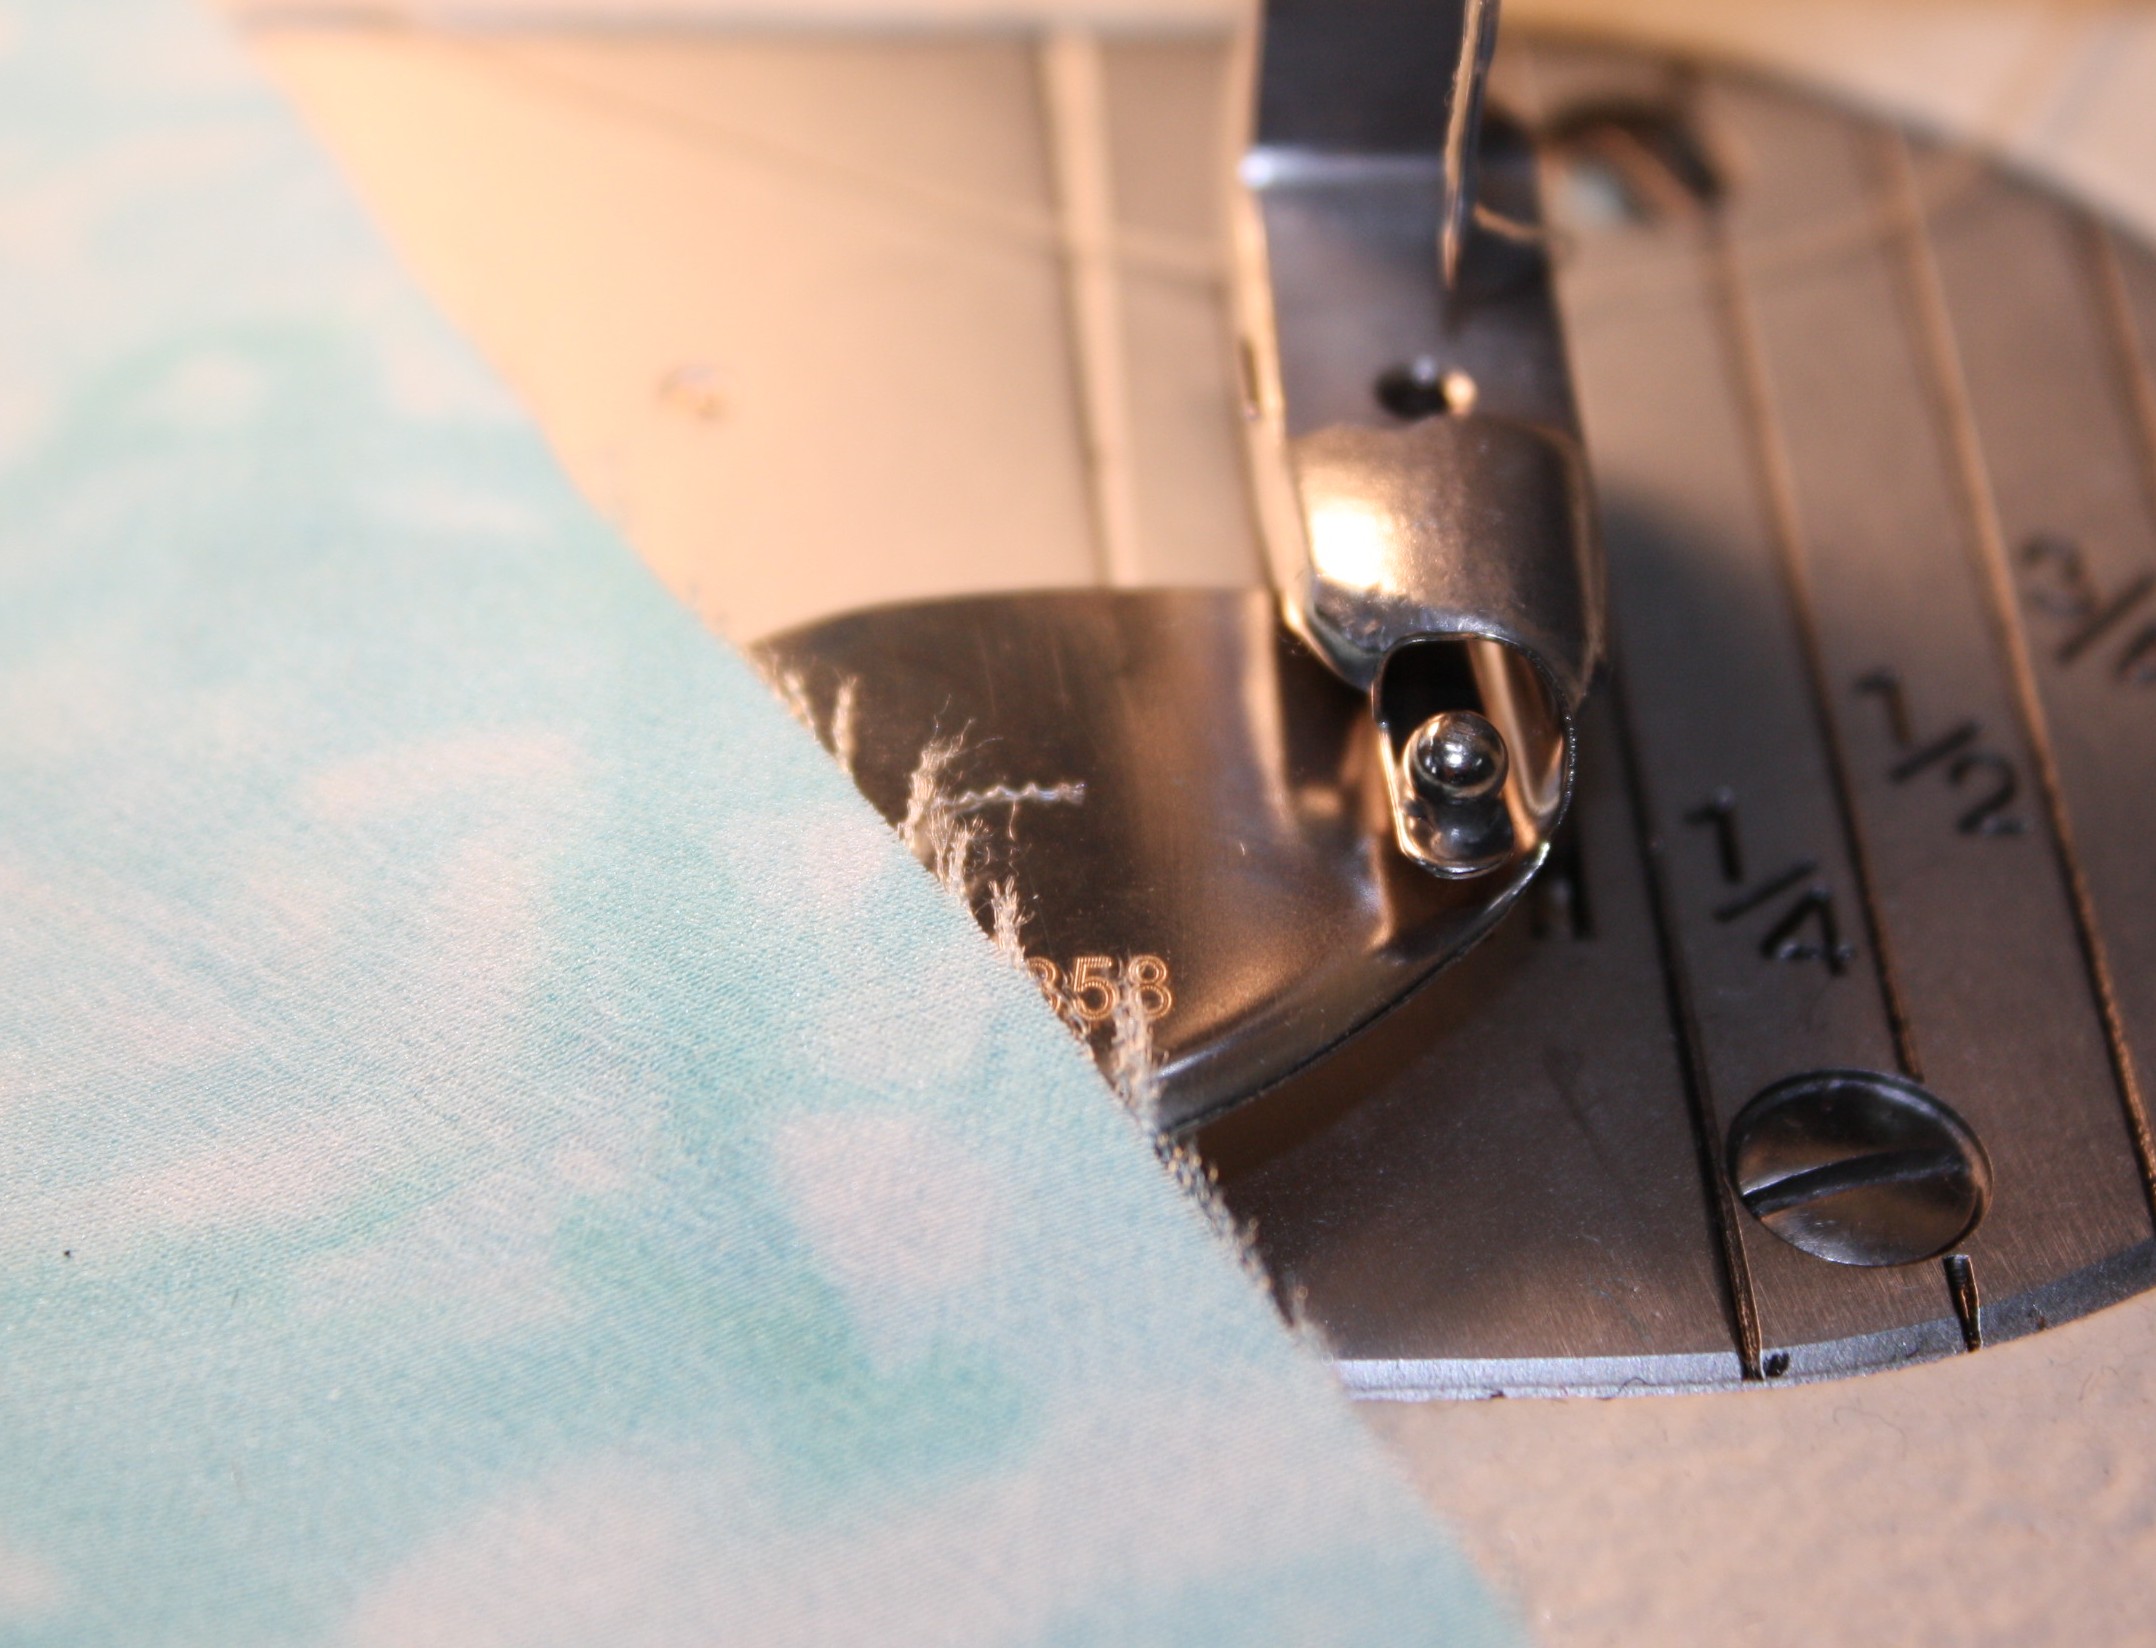
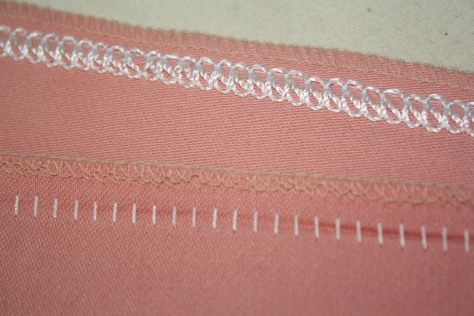
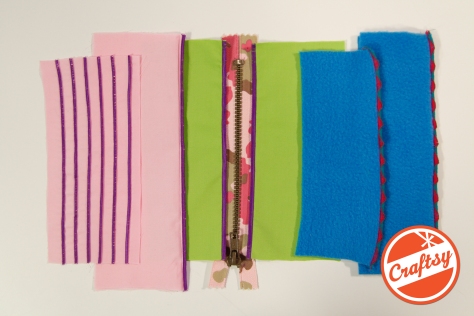
Decorative Thread Ideas:


Get the idea –  be creative!


Next, there are a few changes to the serger settings:

Stitch Width: 5mm

Stitch Length: 2-4mm

Needle Tension:  Decrease to 0 -3 (remember my standard setting is 4 so adjust for your serger)

Upper Looper Tension:  Decrease  to 2 – 3

Lower Looper Tension: Increase to 6 – 9

Disengage the knife

These setting serve as a guide.  It will depend on the fabric and thread you end up serging with.

Blind Hem Stitch Foot

See if you have a Blind Hem Foot, if not you can use a standard foot.

There is a setting on the foot that moves to the right and left, allowing the needle to pierce more or less of the fabric.  Test the stitch on your fabric to determine the setting.

Fold the fabric in half or if you are embellishing a seam,  fold along the seam line.   Align the fabric along the shield on the blind hem foot (if using a standard foot, mark a spot to align with).

Flat lock stitching with Angela Wolf

The idea is for the needle to pierce the fabric –  half the stitch is on the fabric and half is off the fabric.  In fact the stitches look really messy coming out of the serger!

flat lock stitching with angela wolf

Stretch out the folded fabric to lie flat and press.

flat lock stitching with Angela Wolf

Pretty simple, but so fun!  Have you ever tried this before?  I would love some more ideas for decorative threads or yarns to use with this stitch.

wawak brother serger 1034D
Sale on Brother Serger at http://www.wawak.com

Today is officially the end of National Serging month, did any of you pick up a good deal on a serger?

If you are thinking of adding a basic serger to the sewing room, really inexpensively, take a look at this Brother 1034D – on sale for $217 and free shipping!  I had to double-check that, kind of thought it was a misprint  🙂  I have no idea how long the sale is on for or how many are in stock, but that is a great deal.

I will post March’s winners tomorrow evening.  Don’t forget to get April’s photos posted on Flickr and share your pinterest board before Thursday!  Good luck everyone 🙂

Looking for more creative serging ideas?  Join my on Craftsy with 50% OFF today!
Looking for more creative serging ideas? Join my online class Creative Serging – Beyond the Basics. Click here to get 50% OFF today!

xoxo

Angela Wolf


Simply Serged! April’s Wardrobe Challenge How to Sew Simple Apparel

April wardrobe challenge short

As we plug along with the wardrobe challenge, last month offered a chance for sewing designer jeans.  Jeans have become a staple in many of our wardrobes and after you get the hang of the fitting (I still have a few blog posts coming to help) and sewing techniques, jeans can really be fun to sew!  Taking in consideration that jeans can take a while to finish, I am adding an ongoing monthly prize for the best jeans on the Wardrobe Challenge flickr group!  I know many of you mentioned you were not finished and others might join the wardrobe challenge throughout the year – jeans are my favorite and now you can win each month by adding a new pair of jeans 🙂

angela wolf 1003

Onto April’s Challenge – Simply Serged!

This challenge is to come up with fashionable apparel that is quick and easy to finish, yet doesn’t look it.  I am a little selfish on this challenge as I am trying to finish my new serging book (available next spring) and if you all are working on serged outfits, I thought that would inspire me to finish faster 🙂  Also, this month is National Serging Month – not sure what that really means, except you will probably get a good deal on buying a serger if you are in the market for one. 🙂   The serger offers so much more than finishing seams and after sewing jeans or a couture jacket, it is so nice to jump on the serger and finish a silk top in less than an hour!  Take a look at this top:

The Angel Skinny Jean  #AW4212    Angela Wolf

Fabric:  Silk Charmeuse    Time: cut to finish 1 hour 30 minutes

Stitches: 3-thread overlock, coversitch, narrow rolled hem

This is just one example, but I will try to include some of my favorite creative stitches throughout the month.  I just received my new order from WAWAK Sewing  with a batch of thread.  I am trying out new ideas for the serger … I can hardly wait to test them and let you know the results!

Don’t have a serger?  Well, now is the time to buy one, but if you are not quite ready for one you can still participate in the wardrobe challenge on Pinterest.  I am still offering a prize for jeans on the Flickr group and you can still sew simple garments adding to your overall wardrobe.

wardrobe challenge sponsors.png2

Make sure to say Thanks and Like the sponsors pages on Facebook:  Brother,  Threads Magazine, Sew Stylish Magazine, WAWAK Sewing, Coats & Clark, It’s Sew Easy TV, and me 🙂

That’s all for now, onto laying out my fabrics.   Are you enjoying the challenge so far?

Cheers & Happy Serging,

signature


Winner’s of the February Ruching & Shirring Wardrobe Challenge!

Angela Wolf Promo 36I am so excited to announce February’s wardrobe challenge winners!  In case you didn’t notice, the competition is getting fierce – check out the Wardrobe Challenge flickr page and you will see some talented designers!

Thanks again to all the sponsors in this year’s challenge!

wardrobe challenge sponsors.png2

It took a little longer than expected to get February’s results, simply because a few of the judges were on spring break, thankfully that only happens once a year 🙂 Now we are back on schedule!

Angela Wolf patterns 2013 -222February’s challenge had to do with ruching and shirring.  I am absolutely amazed at the creativity showing up on the pinterest boards.  Looking for inspiration?  Each month we are all focused on the same design element and it is really fun to scan the #wardrobechallenge boards.

The new flickr page is showing off all your sewn garments and is absolutely fabulous!  This is where the wardrobe challenge is coming to life.   To show off your work, notice the photos showing up here on the blog.   Maybe you will give us tips on achieving the same look.

Before we get to the winners, quite a few of you asked:

flickrpinterest

Do I need to have a pinterest board and flickr page?  No.  The prizes will be divided up amongst both places each month.  That being said, this is a wardrobe challenge and the grand prize winner of the Brother PQ1500 sewing machine will need both.

Congratulation to Eve Kovacs the winner of February’s challenge and winner of Threads Insider Membership for one year!

Angela wolf wardrobe challenge February winner

This jacket was the kicker – fabulous design and gorgeous detailing.  Eve, everyone is going to want to know what pattern and any tips for sewing with this challenging fabric.  Can you share some tips for us in the comments 🙂  I personally want to buy this fabric, where did you get it?

Winner of WAWAK Sewing $50 gift card

Jana_Duplantis  Great shirring on the front and back of the dress!  Along with a few cute ruched tops – she is adding to wardrobe!

Winner of 1 Pattern, Many Ways DVD from Thread Magazine

Most unique pattern alteration goes to Shawn Hiestand – nice shirring!

Winner of It’s Sew Easy Season 5 DVD

 lkje9999  had quite a few ruched tops and jackets, nice job 🙂

The next two prizes were randomly drawn from February’s pinterest board.  Make sure to include pins from each sponsor every month to qualify for the random drawing 🙂

NEW SPONSOR:  Winner of Coats & Clark zipper collection

Sara Scott  – did you get your coverstitch machine?

Winner of my Craftsy Class Creative Serging!

Diya – by the way, I love that dress!

If you are a winner contact me at info@angelawolf.com

Congrats!!!  I will announce April’s challenge tomorrow … but I will give you a hint – it’s international serging month and keep up on the jeans, there will be another prize for the jeans in April!

cheers,

signature


March’s Wardrobe Challenge … Sewing Designer Jeans!

wardrobe challenge marchWhat an impressive finish to February’s challenge, Ruching & Shirring. The photos posted on flickr are fabulous!  Take a second and click on over and see what these talented sewer’s came up with, such creativity!  And don’t be surprised if you see one of your photo’s on my blog, I have added  pictures from the wardrobe challenge flickr group to the right side of the page.  The photos randomly change, so enjoy previewing the outfits as they arrive  🙂

And the pinterest side of the challenge …  I periodically scan each of your “wardrobe challenge boards” and I must say, my mind is filled with new ideas to add to my apparel, what inspiration!  Don’t forget you can follow each others wardrobe challenge boards, inspire each other to sew 🙂  February’s winners will be announced soon, the judges are busy at work.  In the meantime, let’s talk jeans …

angelawolfjeans1055

March’s Challenge is to design, sew, and restyle jeans.  Many of you have mentioned a fear of sewing jeans.  The fit and the fly are the main concern, guess what – there are great patterns and so many resources to help you along, now it’s time to jump in!

Tutorials & Learningsdj_160x600_v1

My online class Sewing Designer Jeans on Craftsy launched last October and we are just shy of 5,000 students.  Now that’s a lot of jean sewer’s  :).  This class walks you through the entire process of sewing jeans from cutting to the final hem.  And just to promote my Wardrobe Challenge, here is a 50% off for the entire month of March.  Worried about fit,  join my Altering Pants class on Patternreview (which is also on sale)  where you can post photo’s of your muslin for personal fitting advice.  Looking for a few free tips, refer to the jean category on my blog.  There are even video tutorials for sewing pockets.  Now you have not excuse not to give it a try.

Patterns

ThereAngela Wolf patterns 2013 -209 are so many jean patterns available now.  My Angel Bootcut Jean Pattern is my go-to pattern, I taper the legs for skinny jeans, raise and lower the rise, offers a contour waistband for fit and it’s easy to adapt denim with stretch or without.  The sizing currently goes up to size 16 (but I promise I am working on the sizing 16W – 24W sometime in 2014).  Use coupon code MARCHMADNESS for 20% off all jean supplies in my store (yes, that includes rivets, jean buttons, and the It’s Sew Easy jean dvd :)).  My two other favorite jean patterns … Jalie and Jennifer Stern’s ( I adore Jennifer, she is my jean buddy).  You can find reviews for both on PatternReview.com.

Well, that’s enough to get started!  This month I will share major fitting solutions for jeans and much, much more.  Check out March’s Wardrobe Challenge page (now located at the top right) for all the details on the pinterest challenge and flickr info.  Are you new to the challenge and need an invite to pinterest, email me info@angelawolf.com.  I would love you to join us!

Did I mention we have a new sponsor, Coats & Clark.  Yeah, just in time for denim thread!   Join me on Twitter to give a shout out of thanks to our sponsors:

angela_wolf_patterns001004  WAWAK sewing, Threads Magazine, Brother Sews, It’s Sew Easy TV, Coats & Clark

Well are you ready to give it a go?   Good luck!!!!!!

xoxo

signature

Which Iron for Perfect Pressing and Professional Sewing Results …

angela wolf pressing 1 I recall a class I taught years ago, one of the students gave me a review “great class, she is a pressing fanatic!”  Well, that is true.  In reality, pressing is what makes your sewing look professional.  I thought I would share how I have my studio set up:

angela wolf pressing 2

My all time favorite iron is the Hot Steam SGB-600 and I can’t believe how long I went without splurging on such a reasonably priced powerhouse steam iron.  This iron plugs into a standard outlet (make sure to check that when researching commercial steam irons) and has a water container that holds almost an entire gallon of distilled water.  The water container is attached to a wall and then the hose needs to hang from the ceiling or a high point.  I have ceiling tiles in my studio and I am using clips that would typically hold a plant, I think I found them at Ace Hardware.

angela wolf pressing 5

The iron came with the rubber mat, which is nice!  I added the Iron Shoe which allows you press ANYTHING and it won’t leave shiny marks – even on cheap satin and poly!  I will share more about that later.

One more thing, this iron has a powerful burst of steam and it DOES NOT leak, yeah!  Have you ever ruined fabric  from a leaky iron?  Um, this brings back a memory … years ago, I was making a custom suit for a client.  Just visualize a rich colored brown fabric – silk, wool blend.  My iron was having a bad day and a few drips (or I should say a burst of drips) later the suit ended up in the trash.  Very expensive fabric, but I couldn’t get the spots out!  I have had this iron for quite a while and have never had as much as a drop.  

angela wolf pressing 3

Did I mention, I can’t stand irons that automatically turn off!  What a waste of time, it’s never hot when you need it.  That being said I do keep around a couple inexpensive Rowenta’s
for applying interfacing.  They are easy to clean, very hot, and don’t usually leak (I say that with a squint in my eye as every iron seems to have its own personality, although out of about 30 Rowenta’s I only had 2 that dripped and 1 that caught on fire – another eventful day in the studio!).

Tip: keep a tube of Ez-Off Iron cleaner around – perfect for removing interfacing gook!

Do you have a favorite iron or a dripping horror story to share?